How to Install an Outdoor Wine Cooler
Understanding Outdoor Wine Cooler Installation
Installing an outdoor wine cooler isn’t just about convenience—it's about protecting your investment and ensuring top performance in any outdoor environment. Proper installation helps maintain consistent temperatures, optimal ventilation, and extended unit life. Choosing an outdoor-rated wine cooler offers even more peace of mind, with heat- and humidity-resistant materials to handle heat, humidity, and fluctuating conditions.
Whether you're equipping a full outdoor kitchen or just enhancing your patio configuration, a dependable outdoor wine cooler ensures entertaining is hassle-free. Be sure to explore our complete outdoor refrigeration buying guide if you need help finding the right unit for your space.
Choosing Between Freestanding and Built-In Wine Coolers
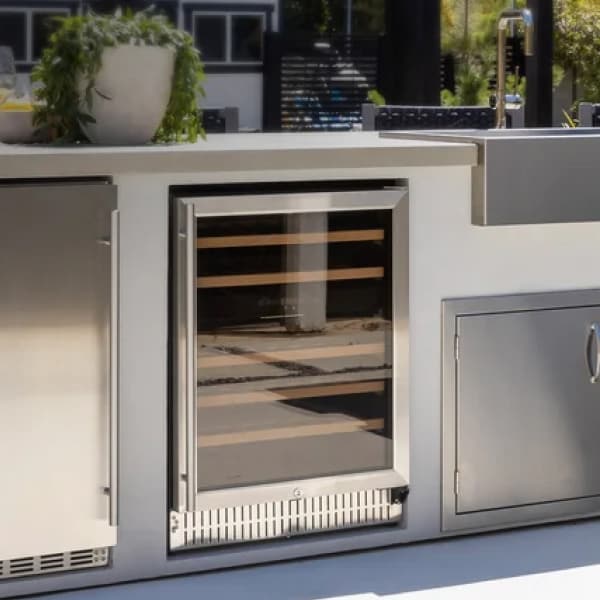
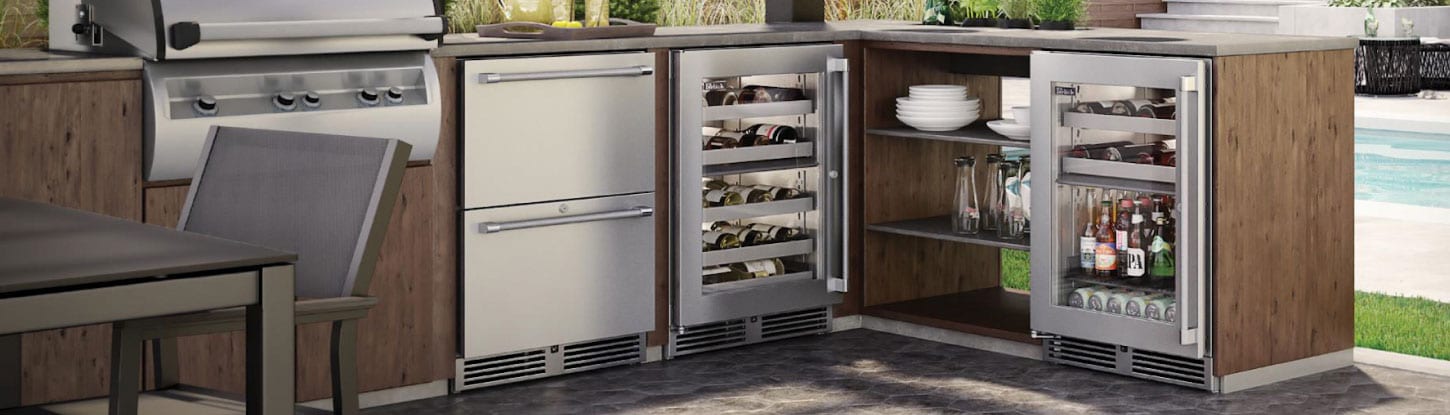
Built-In Outdoor Wine Coolers
Built-in outdoor wine coolers are designed for seamless integration into outdoor kitchen islands or cabinetry, featuring front-venting systems that allow for flush installation without overheating. They need accurately sized cutout spaces and adequate clearance room around the vent to offer proper airflow. It is an ideal choice if you’re looking for a permanent outdoor setup and want a smooth, streamlined aesthetic.
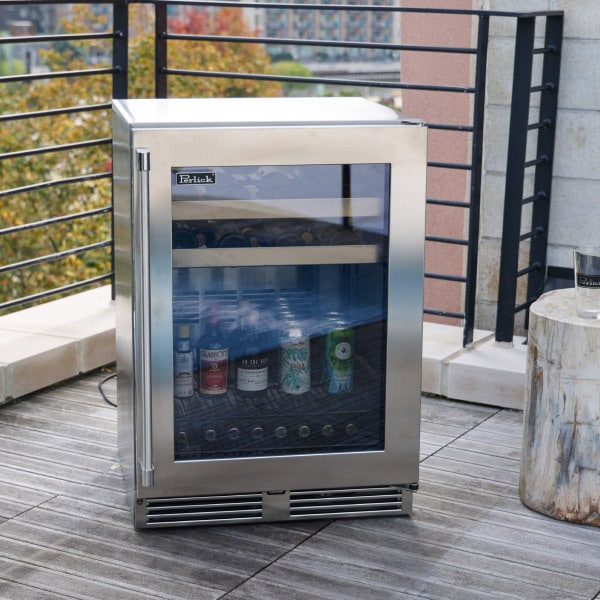
Freestanding Outdoor Wine Coolers
Freestanding units provide greater convenience and are ideal for patios, garages, or covered outdoor spaces where permanent installation is not an option. Freestanding coolers vent in the rear or on the side and require a good clearance—typically a couple of inches on all sides—to avoid overheating. Less concealed than built-ins, freestanding coolers are simple to move and ideal for users who want a less permanent option.
Gather Tools, Materials, and Prepare the Installation Area
Before you begin installation, keep in mind that every wine cooler model is a little different, so be sure to consult the manufacturer’s manual for detailed instructions and requirements. That said, most installations follow a similar process and may call for the following tools and materials:
- Measuring tape
- Level
- Screwdriver or drill
- Ventilation spacers (if required)
- Electrical outlet within reach (one recommended for outdoor use)
- Weatherproof sealant (for built-in installations)

How to Install a Built-In Wine Cooler
If you've chosen a built-in outdoor wine cooler, proper installation is key to maintaining performance and longevity. These units feature front ventilation, eliminating the need for rear clearance and allowing for flush installation within outdoor kitchen islands or cabinetry. Still, it’s essential to follow cutout specifications closely to ensure proper fit and airflow.
-
Choose the proper storage area.
Be sure to research where you would like your built-in unit to be placed. Make sure the area you choose is not near another appliance that puts off unwanted heat, like a space heater, or in direct sunlight. Installing your built-in unit too close to a hot-functioning appliance may damage the wine cooler or cause unwanted temperature ranges during the wine chilling process. -
Make sure your unit is near the proper outlet.
A standard built-in cooler typically requires a 110-volt outlet. Some larger units require 220-volt, in which case you should install a separate breaker on your fuse box to accommodate the cooler. Always plug the unit in before sliding it into place, leaving a small gap behind the cooler to avoid stress on the cord and plug. Never run the cord under the unit or place it where it could be pinched. Also avoid using an extension cord unless the owner’s manual explicitly states that it is acceptable. -
Measure properly, so that your wine cooler is installed accurately.
Accurate measurements are crucial for a clean, secure fit. An opening that’s too small can scratch or damage the cooler and lead to vibration issues that disturb sediments in your wine collection. Too large, and you may lose the streamlined, integrated look that built-in units are designed to provide. -
Level your cooler to reduce vibration.
Most wine coolers come with leveling legs. These are small, adjustable feet on the bottom of the cooler. The vent cover conceals these when the unit is in use, but they can be easily adjusted to provide the proper height. The top of the cooler should be an equal distance on each side from the bottom overhang of your countertop. -
Add trim or cabinet overlay.
An overlay helps to further conceal your wine refrigerator. Custom panels and custom trim are an easy way to blend your cooler in to match your kitchen cabinets. Research your cabinet color and apply matching painted or wood-stained paneling to complete the custom look of your built-in wine refrigerator.
How to Install a Freestanding Wine Cooler
If you're looking for flexibility in placement and a simple way to showcase your collection, a freestanding outdoor wine cooler is a great solution. These units are designed to stand on their own and typically vent from the rear or sides, making proper positioning essential. Always confirm your unit is rated for outdoor use—indoor models are not built to handle the heat, humidity, or exposure found outside.
-
Know the difference between freestanding and built-in.
A freestanding unit is not meant to function like a built-in unit, unless the owner's manual indicates that it can be built in or freestanding. Ensure that your freestanding unit has been installed in the proper conditions to bring out the maximum potential and performance of your freestanding wine refrigerator. -
Select the proper storage area.
Make sure your freestanding wine storage unit is not close to any major heat-producing appliances that will affect temperatures. If your storage unit is near another heat-producing appliance, like a grill or smoker, you may damage the exterior of the wine cooler or affect the temperature within. If the unit is not meant to operate outdoors, exposing it to outdoor elements will also damage the cooler and effect wine chilling. -
Avoid safety hazards.
A freestanding unit requires proper space in the back to allow for proper ventilation. Placing the unit directly against the wall can be a serious fire hazard. Allow a few inches from the wall to ensure fire safety is maintained and always consult your user manual for proper clearances. Avoid placing a freestanding unit in a confined space without allowing for additional space around it. Doing so can also lead to dangerous fires or malfunctions in the appliance.
Final Considerations and Expert Tips
Before completing your installation, ensure your wine cooler is properly leveled, securely plugged in, and out of direct sunlight or heat sources. If your unit features a lock or security function, now is the appropriate time to install it for added safety. For the best performance, let the unit run for several hours and stabilize before stocking your wine collection.
Maintaining Your Outdoor Wine Cooler
Routine maintenance helps extend the life of your wine cooler and keeps your collection at optimal temperatures. Periodic cleaning of the exterior and vents prevents dust or debris accumulation, particularly in outdoor uncovered areas. Check the door seal, the temperature controls, and the power cord every now and then for uninterrupted performance all year round. For additional answers to maintenance questions, please see our Outdoor Refrigeration FAQ.
